Once you have mastered the Essentials, you might be ready to play a little bit more, explore more advanced functions, and take on a little more challenge. If this is you, you might be an enthusiast. We named this program after you!
• Stitch editing
You can select stitches in your design using Lasso and similar tools; move, delete, copy paste, split, and more. Repair gaps in stitching. Adjust compensation, change stitch type from satins and fills, select and correct stitch types, including cleaning up jumps, ensure tie stitches before and after jumps.
• Multiple hooping
Many built-in multiple position hoops pre-loaded. Split AUTOMATICALLY using our patented feature. Use Mega Hoop, Plus Hoop, Jumbo Hoop, Dream Hoop, etc.
• Baste Hoop
Beyond basting a design, sometimes tricky fabrics and toppings require an extra bit of help.
• Precise Position
Accurate positioning of any design on the page. Use this advanced customizing feature for perfect layouts.
• Mirror X 4
Take corner designs and perfectly set them in all four corners of the hoop.
• Instant repeat
Repeat a design across and down. Make a nice effect.
• Carousel
Create a circular composition out of your designs.
• Scatter
Unique effect to create copies of your designs, including lettering, for neat effects on large spaces.
• Advanced Thread editor
Beyond the Essentials palette creator, the Enthusiast editor lets you make your own thread brands, and pick colors right off web pages or PDFs.
• Advanced Stitch properties
Control satin and fill density within each color layer in any stitch file.
• Save Image utility menu item
Create a transparent .png file of the current design page for use on the web, etc.
 The ability to edit individual stitches is a
very useful tool. Sometimes there are parts of a design that you simply do not
want. Other times, there are jams of stitches that simply cannot be removed any
other way. In still other cases, you want to add a few stitches to get rid of
gaps or increase coverage in an area that’s not necessarily a fill. Maybe you
just want to make a pocket topper?
To begin editing a design’s stitches, click the Stitch Edit button on the toolbar. This will cause the Tool pane to display the Stitch Edit controls, and the main view will show the stitch points.
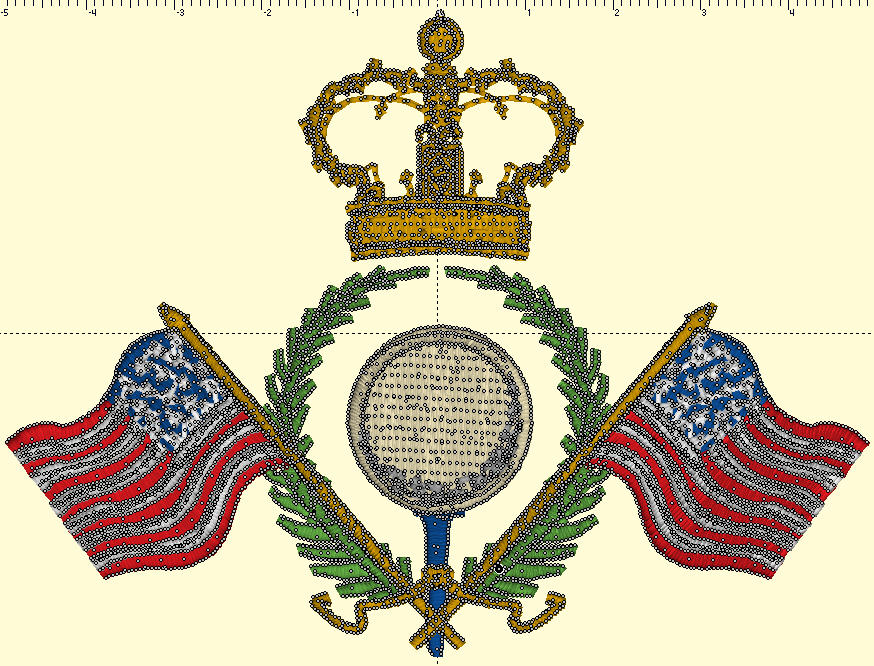
Stitch points can be turned on or off from the View menu. They help identify the individual needle penetrations in the design.
Stitch selection is accomplished two ways:
1.) A range of continuous stitches.
2.) A graphical section of stitches (lasso, rectangle, brush selection).
You can select a range of stitches by clicking an ‘Anchor’ stitch, and then use the keyboard to select additional stitches. (See the keyboard reference at the end of this section.)
Here you can see that we’ve selected a range of stitches inside the golf ball, but we’ve skipped the satin stitches that go around the edge. If we hit delete on the keyboard, we can remove them!
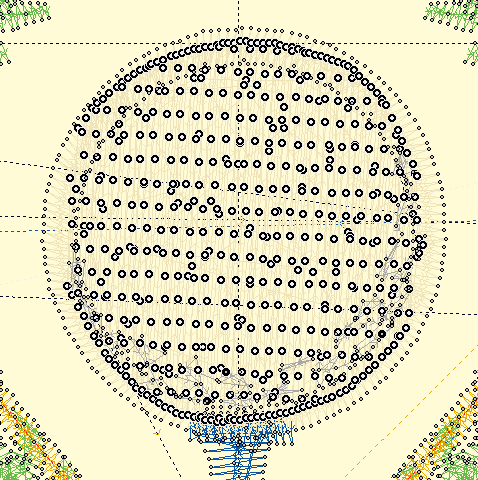
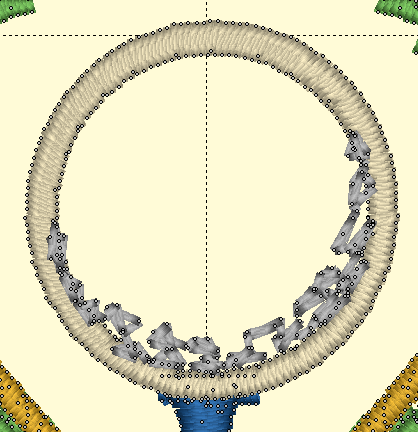
Another way to select stitches is graphically. You can drag a rectangle or a lasso around stitches to select them. You can also use the Brush selection, which selects anything the cursor touches, or with the Ctrl key, the brush can de-select points. Selected stitches can be deleted with the ‘delete’ key or split using the ‘Split’ button.
You can also select stitches for an entire object or design using the Object View. While in Stitch Edit mode, simply select objects in the tree and the corresponding stitches will be selected.
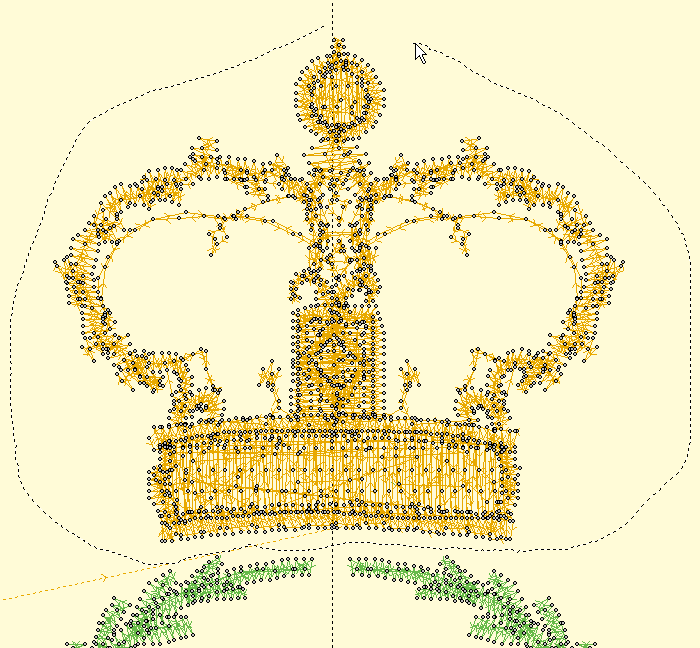
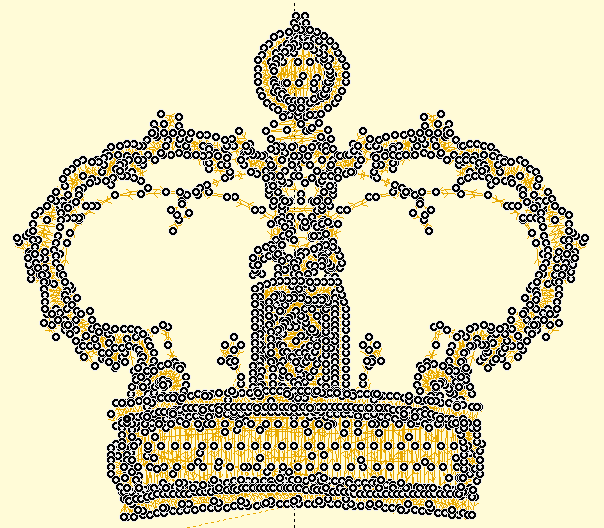
Left: Lasso. Right: Selected
You can also select a single stitch by clicking on the line representing the stitch itself. Make sure no other stitches are selected first, and then simply click on a stitch line. The stitch point at the end of that line will select. This makes it easier to select a single stitch out of a jumble of stitches that may exist near each other.
You can right-click to bring up a context menu which will give you the ability to switch stitch types between Jump and Normal stitching. For color stop inserting, use the Sewing simulator.
When you convert a stitch to a Jump, you have the option of ensuring the stitches on either side are tied off. If you choose this option and the stitches are already tied off, then no stitches will be inserted.
If you have a stitch that appears not to be ties down, and you will want to cut it, you can ensure ties using the context menu. Simply select the stitch (as directed above) and then right-click for the context menu.
 Once stitches have been selected, you can
delete them or split them, To split them, click the ‘Split’ button. This will
create a separate design for the selected stitches. It will also remove the
stitches from the current design. If your design is lettering or a Library
design, this process will convert that design to stitches so you will not be
able to adjust that design the same as before.
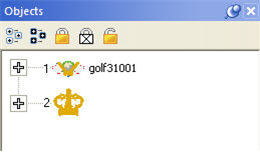
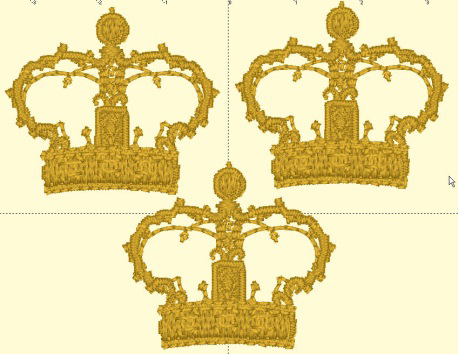
Above, the design has been split, and the crown was copied and pasted.
If you have a stitch selected, you can right-click to get a pop-up menu which will let you insert stitches.
Notice that you can see the direction of the stitches when you are zoomed in. This helps determine ‘before’ or ‘after’. The arrow on each stitch points toward the next stitch as the design would sew.
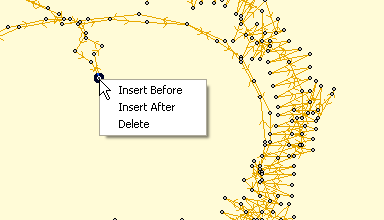
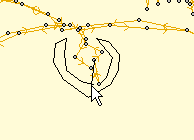
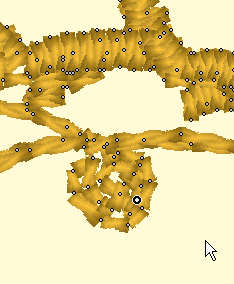
Left: Right-click to select the Insert mode.
Middle: Inserting stitches.
Right: Stitches have been inserted.
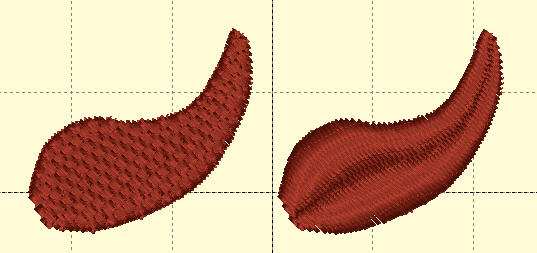
Using the ‘Satin’ Drop-down box, you can convert selected stitches to a satin stitch, a choice of split satin stitches, or even add a fill effect to an existing satin stitch.
Once stitches have been selected, you can add compensation, which makes the outside stitches of fills or satins a bit longer or shorter. This is useful when you have gaps in a stitch-out and you would like to ‘stretch’ the stitches together, thus reducing or eliminating the gaps. You can also use compensation to adjust the width of lettering you may have imported.
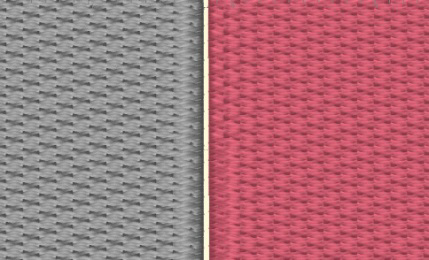
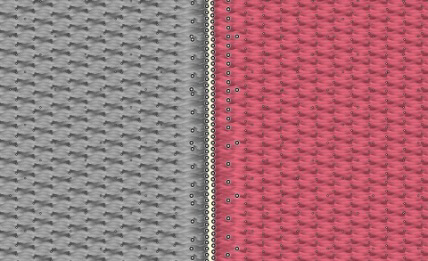
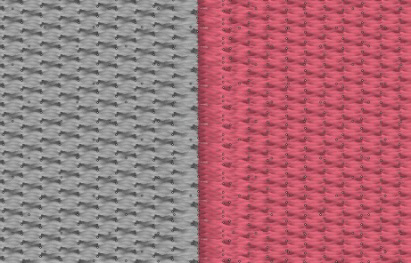
Left: a typically gapped design. Middle: The stitches around the gap are selected. Right: Compensation has been added by moving the slider to the right.
Left Arrow: Select Backwards
Right Arrow: Select Forward
Up Arrow: Select Forwards 10 stitches
Down Arrow: Select Backwards 10 stitches
Page Up: Select next command (jump or color)
Page Down: Select previous command
Home: Select First stitch
End: Select last Stitch
Delete: Delete selected stitches
Shift Left Arrow: Range select backwards
Shift Right Arrow: Range select forward
Shift Up Arrow: Range select forwards 10 stitches
Shift Down Arrow: Range select backwards 10 stitches
Shift Page Up: Range select next command (jump or color)
Shift Page Down: Range select to previous command
Shift Home: Range select to first stitch
Shift End: Range select to last Stitch
You can precisely position designs using these buttons. The three buttons on the (top, left) control the display of the x-axis position. There are Left, Center and Right, which means that when you have the Left button set, the display will be of the left edge of the design.

Similarly, the bottom three buttons control the vertical axis, top, center and bottom respectively. The position controls are very useful for creating tiled patterns.
Your best friends will be the top ruler and left ruler along the edge of the Design Page. You will notice that center of the ruler is “0”. To the left of “0” is -. To the right of “0” is plus. Let’s place a design on the design page and get started with Precise Position!
1. Decide what size embroidery hoop you are going to use and open it onto the Design Page. You will notice that there are four quadrants inside the hoop.
2. Open a design onto the design page.
3. Place the design in the top left quadrant. Note the numbers in the x and y location boxes. (-47.17 and 50.25)
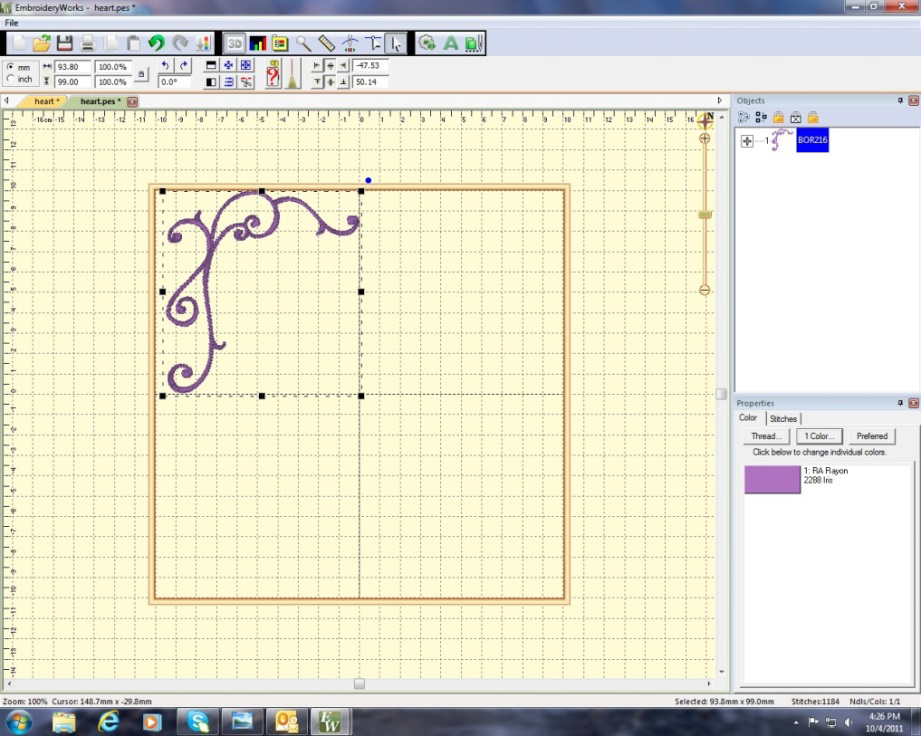
4. Select the design and right click to copy and then right click to Paste the design.
5. Click on Flip Horizontally .
6. Delete the “-“ from 47.53 and hit enter. This will move the copied design to the right top corner.
7. Select the design and rigt click to copy and then right click to Paste the design.
8. Click on Flip Vertically.
9. Place a “-“ next to 50.14 in the y location box. (-50.14)
10. Hit enter. The design moves to the bottom right corner.
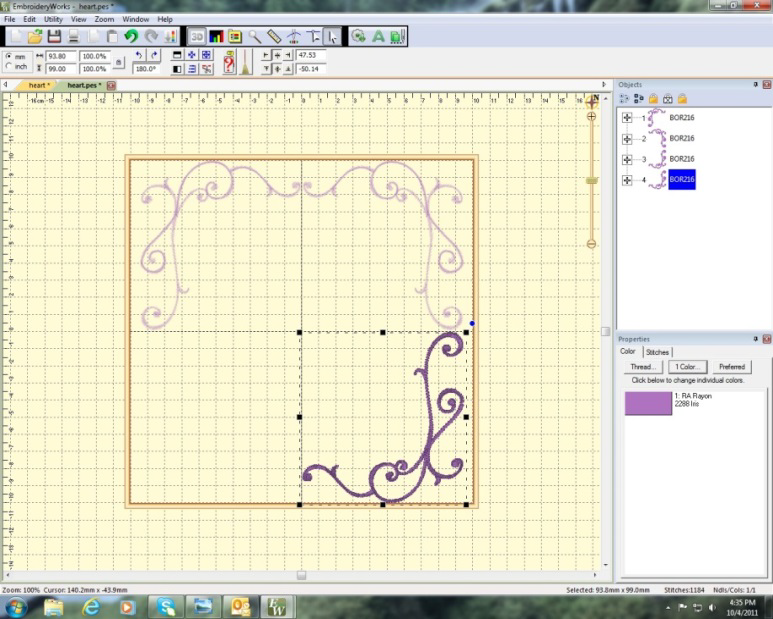
11. Copy and paste the design in bottom right corner.
12. Click on Flip Horizontally.
13. Place a “-“ next to 47.53 (-47. 53) in the x location box. Hit Enter.
14. Your frame is now complete!
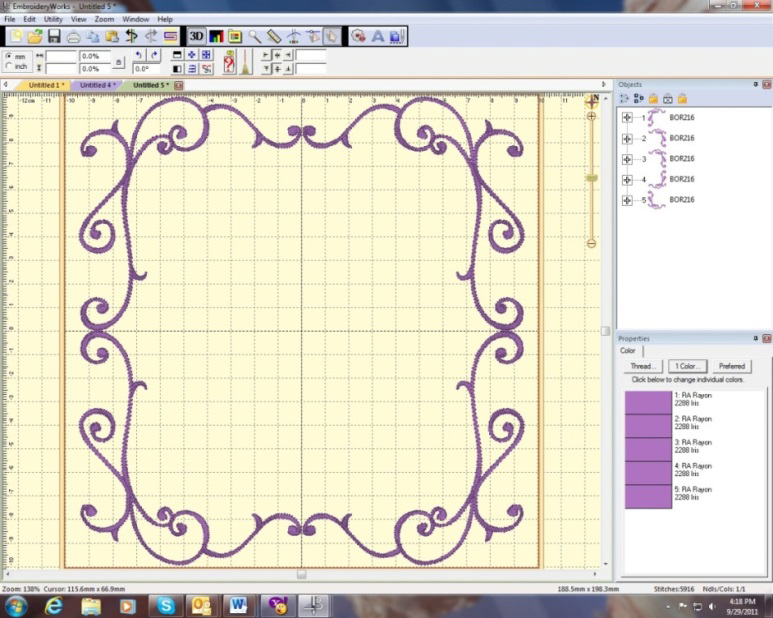
This is a great way to align your designs without the frustration of where you placed the first design and how to get the others to follow suit.
From the Utility menu, select “Instant Repeat.” This will call up a window that lets you create a pattern of designs, copied from the current selection, and pasted in rows and columns.
To change the values, you can click the arrows next to each value, or type in a value and then click on another one to set it.
As you change the values, you will see your result on the main view.
Click OK to accept your new designs.
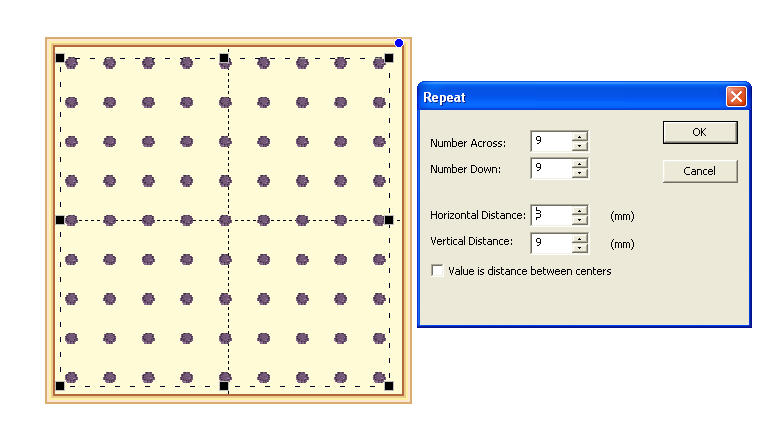
Above: An example of a repeated design.
Notice how the preview enables you to see the pattern as you adjust it, which helps if you’re trying to fit an area, for example the hoop.
Note: The initial design will be the (top, left) design, and the copies will go to the right and down.
From the Utility menu, select “Mirror X4.” This will call up a window that lets you create a pattern of designs, copied from the current selection, and pasted in mirrored corners.
To change the values, you can click the arrows next to each value, or type in a value and then click on another one to set it.
As you change the values, you will see your result on the main view.
Click OK to accept your new designs.
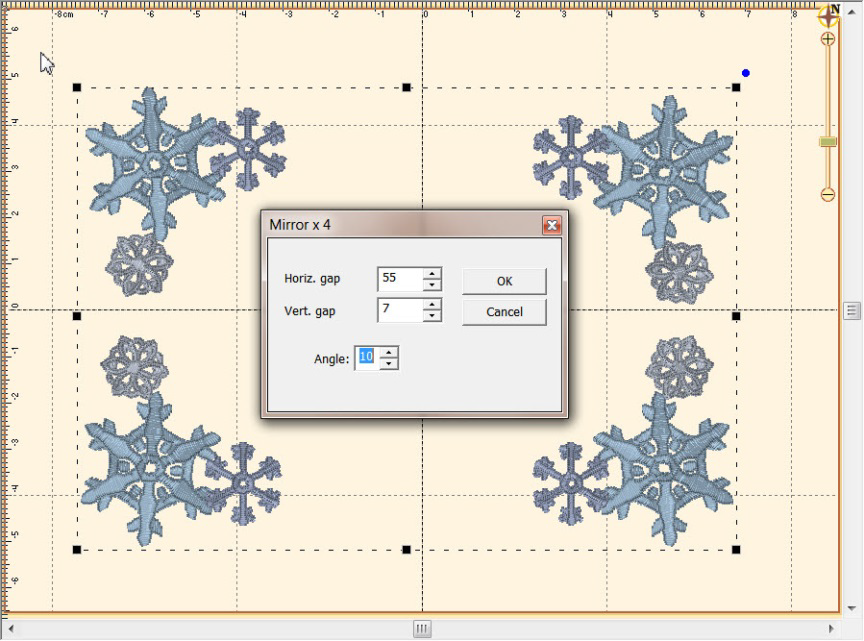
Above: An example of a Mirror X4 design.
Notice how the preview enables you to see the pattern as you adjust it, which helps if you’re trying to fit an area, for example the hoop.
Note: The initial design will be the (top, left) design, and the copies will go to the right and down.
From the Utility menu, select “Carousel.” This will call up a window that lets you create a pattern of designs, copied from the current selection, and pasted in an elliptical fashion
To change the values, you can click the arrows next to each value, or type in a value and then click on another one to set it.
As you change the values, you will see your result on the main view.
Click OK to accept your new designs.
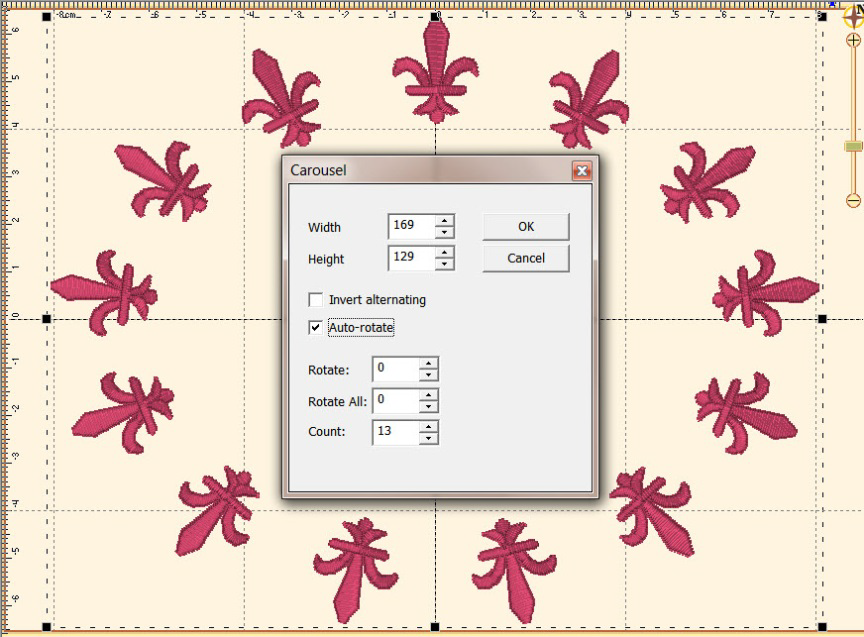
Above: An example of a Carousel design.
Notice how the preview enables you to see the pattern as you adjust it, which helps if you’re trying to fit an area, for example the hoop.
Note: The initial design will be the (top, left) design, and the copies will go to the right and around.
From the Utility menu, select “Scatter.” This will call up a window that lets you create a pattern of designs, copied from the current selection, and pasted in random locations based on your dialog box selections.
To change the values, you can click the arrows next to each value, or type in a value and then click on another one to set it.
As you change the values, you will see your result on the main view. Click on New Pattern to generate a new random pattern based on the selected values
Click ‘OK’ to accept your new designs.
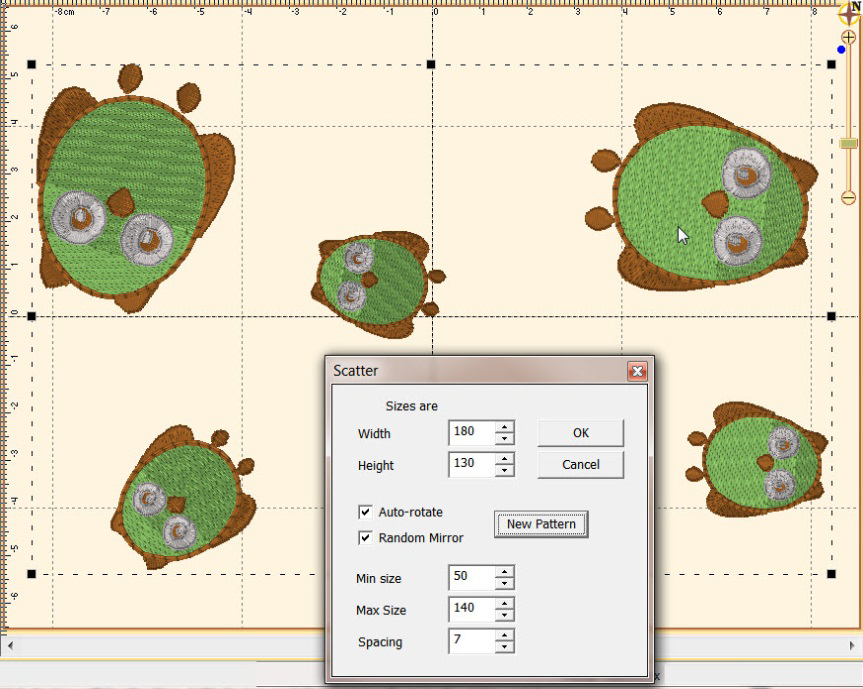
Above: An example of a Scatter design.
Notice how the preview enables you to see the pattern as you adjust it, which helps if you’re trying to fit an area, for example the hoop.
Note: This is a way to get a random repeat of similar designs.
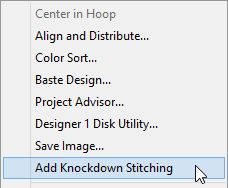 When sewing on terry or any fabric with loops
and nap, generally a topping stabilizer is used. These can be helpful, but have
a limitation: They do not hold down the nap past the actual stitch, which means
outlines can be lost in the surrounding fabric. Using the menu Utility->Add
Knockdown Stitches you can create a gloabal underlay for the entire design. The
underlay extends a few millimeters past the edge of the design, which helps the
overall effect.
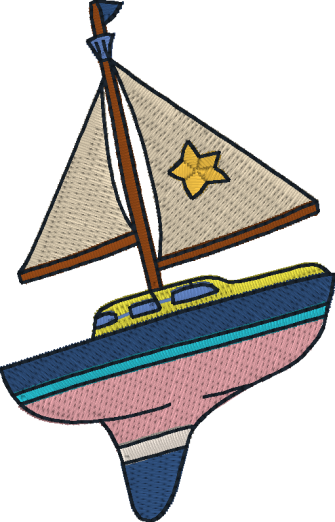
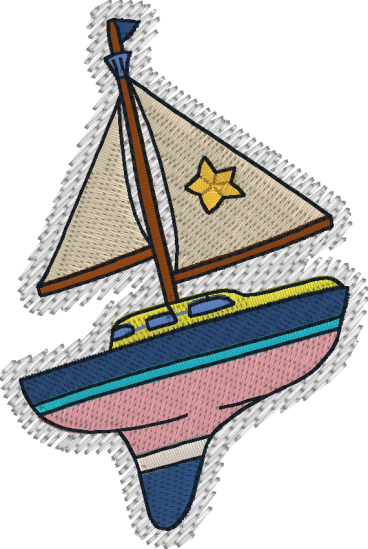
You can quickly save a transparent .PNG file of your design page with this item, found on the Utility menu. The image is created at 600 DPI. You can use any image editing program to adjust size or save as a different image type, if desired. This utility is useful for putting designs on the web, in print, etc. The images above were created with it.
With Essentials, individually selected designs can have a basting stitch added automatically. This is useful when you want to add a layer of stabilizer or some other material before the sewing of a design.
But with Enthusiast, a basting stitch can be added to the hoop, which allows for a layer of topping stabilizer to be basted in place before any designs are sewn. A typical use of this is to add a layer of water-soluble topping to a towel, which will prevent the terry cloth loops from coming up through the embroidery. It can be hard to hoop a towel, and the topping stabilizer will want to slide around before the stitching happens, so basting it first can make the process easier.
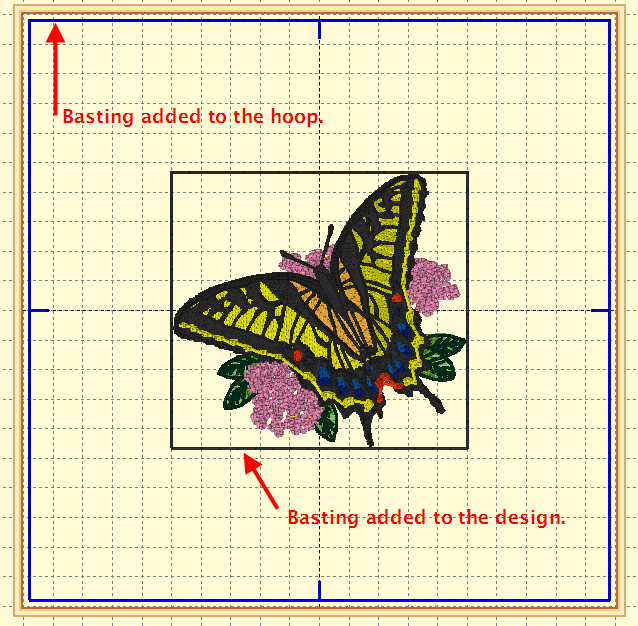
The basting stitches are added to the start of the design or file, and are added as a separate color; naturally you can use any color you want to sew the baste.